반응형
Keras Tuner Tutorial
https://www.tensorflow.org/tutorials/keras/keras_tuner?hl=ko
keras tuner를 사용하면 하이퍼파라미터 최적화를 쉽게 할 수 있다.
Hyperparameter tuning이란
신경망을 훈련하는 동안 손실, 훈련/검증 정확도를 모니터링하여 적절한 훈련이 되도록 hyper-parameters를 제어해야한다. (다른 parameters의 값은 훈련을 통해 도출된다.)
Neural Networks 훈련의 성공에 올바른 hyperparameters 선택이 중요한 영향을 끼진다. 하이퍼파라미터를 선택하는 과정을 하이퍼파라미터 튜닝이라고 한다.
- Hyperparameters: learning rate, lr decay schedule, dropout rate 등!

Overfitting(과적합)이란 모델이 train dataset에는 높은 정확도를 가졌지만 일반화되지 않았다는 의미로 test data를 잘 예측하지 못할 가능성이 높다.
Code 예시
https://blog.tensorflow.org/2020/01/hyperparameter-tuning-with-keras-tuner.html
import tensorflow as tf

# model 정의
# : 튜닝할 hyperparmeter를 여기서 정의
# 튜닝하는 방법 예시)
# hp.Int(hp_name, min_value, max_value, step)
# hp.Float(hp_name, min_value, max_value, sampling)
# hp.Choice(hp_name, values)

def build_model(hp):
  inputs = tf.keras.Input(shape=(32, 32, 3))
  x = inputs
  for i in range(hp.Int('conv_blocks', 3, 5, default=3)):
    filters = hp.Int('filters_' + str(i), 32, 256, step=32)
    for _ in range(2):
      x = tf.keras.layers.Convolution2D(
        filters, kernel_size=(3, 3), padding='same')(x)
      x = tf.keras.layers.BatchNormalization()(x)
      x = tf.keras.layers.ReLU()(x)
    if hp.Choice('pooling_' + str(i), ['avg', 'max']) == 'max':
      x = tf.keras.layers.MaxPool2D()(x)
    else:
      x = tf.keras.layers.AvgPool2D()(x)
  x = tf.keras.layers.GlobalAvgPool2D()(x)
  x = tf.keras.layers.Dense(
      hp.Int('hidden_size', 30, 100, step=10, default=50),
      activation='relu')(x)
  x = tf.keras.layers.Dropout(
      hp.Float('dropout', 0, 0.5, step=0.1, default=0.5))(x)
  outputs = tf.keras.layers.Dense(10, activation='softmax')(x)

  model = tf.keras.Model(inputs, outputs)
  model.compile(
    optimizer=tf.keras.optimizers.Adam(
      hp.Float('learning_rate', 1e-4, 1e-2, sampling='log')),  # 참고: 적절한 learning_rate = 10 ** uniform(-6, 1)
    loss='sparse_categorical_crossentropy',
    metrics=['accuracy'])
  return model
import kerastuner as kt

# Keras Tuner에는 RandomSearch, Hyperband, BayesianOptimization 및 Sklearn의 네 가지 튜너가 있음
tuner = kt.Hyperband(
    build_model,  # model compile까지 포함
    objective='val_accuracy',  # best val_accuracy 기준으로 최적화
    max_epochs=30,
    hyperband_iterations=2,
    directory='my_dir',
    project_name='tuner'
)
import tensorflow_datasets as tfds
import IPython
class ClearTrainingOutput(tf.keras.callbacks.Callback):
def on_train_end(*args, **kwargs):
IPython.display.clear_output(wait = True)
data = tfds.load('cifar10')
train_ds, test_ds = data['train'], data['test']
def standardize_record(record):
return tf.cast(record['image'], tf.float32) / 255., record['label']
train_ds = train_ds.map(standardize_record).cache().batch(64).shuffle(10000)
test_ds = test_ds.map(standardize_record).cache().batch(64)
## Hyperparameter Search (Train)
tuner.search(train_ds,
validation_data=test_ds,
epochs=30,
callbacks=[tf.keras.callbacks.EarlyStopping(patience=1),
ClearTrainingOutput()])# Get the optimal hyperparameters
best_hps = tuner.get_best_hyperparameters(num_trials=1)[0]
# best_model = tuner.get_best_models(1)[0]
Hyperparmeter Tuning 과정 예시
- cifa10, resnet50으로 테스트 결과
- 튜닝한 hyperparameter
- : dense units, kernel_rate(lr regularizer), dropout, learning rate
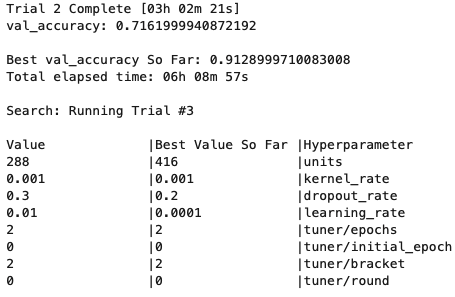
- Tensorboard로 확인하기: https://www.tensorflow.org/tensorboard/hyperparameter_tuning_with_hparams
반응형
'PYTHON으로 딥러닝하기' 카테고리의 다른 글
| Model Conversion between Tensorflow and Pytorch | From TF To Torch (0) | 2022.07.12 |
|---|---|
| Model Conversion between Tensorflow and Pytorch (0) | 2022.07.05 |
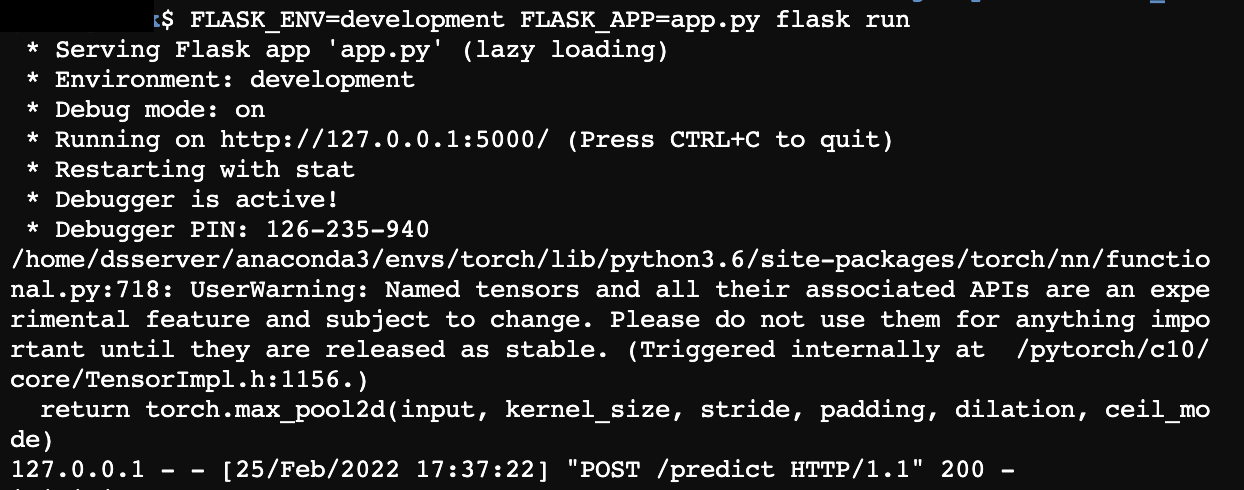
| Custom Pytorch Model serving with Flask (0) | 2022.03.02 |
| Python으로 딥러닝하기| Generative Model & GAN (0) | 2021.12.19 |
| Python으로 딥러닝하기|자연어 2. 단어 임베딩, Word2Vec (0) | 2021.11.04 |